
So, I turned to google, and began my hunt for this mirror. I thought maybe I could find one on ebay, but in my search, I came across a couple of blogs that offered tutorials on how to make this mirror (I thought I heard angels singing).
Rather than reinvent the wheel, here are the websites we used to aide us in creating this beautiful mirror: http://starterhometodreamhome.blogspot.com/2009/11/my-diy-60-pottery-barn-knock-off.html, http://beingbrook.com/mirror-inspired-by-pottery-barn-eagan-mirror/, and http://theletteredcottage.net/eagan-mirror-tutorial/.
We purchased the 8x8 mirrors from Walmart.com. They were precisely 8"x8", with no variations. They came as a box of 6 and cost roughly $19. We wanted our finished mirror to be about 50 inches wide, and 34 inches high, frame and all. So, we purchased 5 boxes of mirrors (30 mirrors). We ordered extra in the event that we broke a mirror or some had imperfections. We ended up putting six 8x8 inch mirrors across, and 4 8x8 inch mirrors down, totaling 24 mirrors in all.
When my hubby made the frame for the mirror, there was a lot of measuring and re-measuring. We opted to use particle board and had it cut to size at Home Depot. We didn't want to fuss with buying two smaller pieces and adhering them together so we paid a little more and bought a full sheet of particle board. We also purchased our picture frame molding at Home Depot. The back of the mirror looked something like this

We added the hanging hardware at this point, as we didn't want to be pounding or nailing anything into it with the mirrors on the other side. Be sure to purchase hanging hardware that will support as many pounds as the mirror will actually be. The bigger the mirror the heavier it will be, obviously.
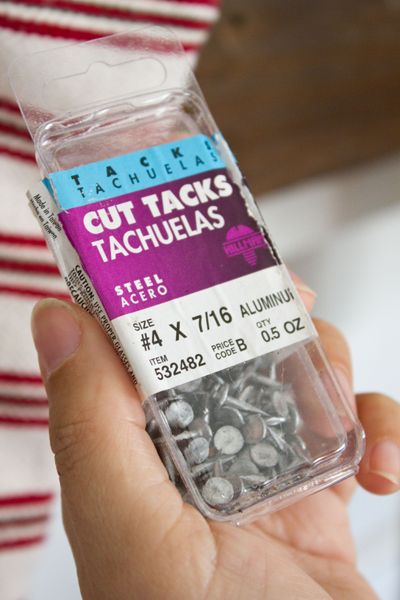
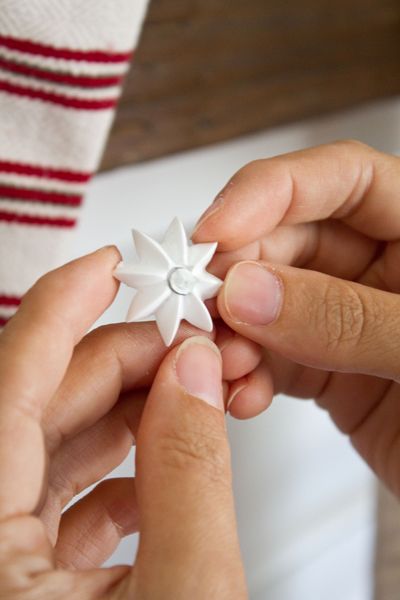
Once the grid was measured and drawn on the front of the particle board, we began cutting and gluing the molding (it's helpful to use a mirror as a guide when gluing the molding into place. We bought plastic mirror rosettes to place at each cross-section, and nailed them into place with cut tacks size #4.

Photos Courtesy of The Lettered Cottage
I couldn't find the rosettes at my local Home Depot or Lowes, as they only offered clear ones, so I just went on-line and ordered some. Warning.....I think I paid more in shipping than I did for the actual rosettes!
Once we were done this process, we sprayed painted the HECK out of it! We used Oil Rubbed Bronze. Gotta love spray paint. After numerous coats,we let it dry, and then put some liquid nails on the back of each mirror and popped them into place. Let it dry and you will have a beautiful hand-crafted mirror that looks just like the one from pottery barn, but for much less money. I think we had about $160 into our mirror but it's just beautiful and exactly what my dining room needed. Stay tuned for more photos of my dining room redo!


No comments:
Post a Comment