Aren't those 3-dimentional paper flowers absolutely adorable!!! Once I saw them I just had to recreate that look for my daughter's room. My daughter is extremely girly. Everything has to be pink and frilly, so I knew she would embrace these beautiful flowers. I loved the branches, but thought it would be rather daunting to make those out of paper, and then how would I adhere them to the wall, without it taking the paint off the walls when my daughter no longer wants pink flowers on her wall. So, I decided that I would have the branches be an adhesive wall decal, and then I would make the flowers out of paper and adhere the flowers to the decal. So, I sent this adorable picture from pottery barn kids over to dalidecals.com. They will custom make anything for you. These decals are great, as they are super easy to put on the wall, and they peel off without taking the paint off. I simply figured out where exactly I wanted the decal in my daughter's room, and then explained that in the description section at checkout, as well as the length and width. They created a proof and e-mailed it to me for review. After making a few necessary changes, I gave them my seal of approval and they created the decal, and mailed it to me.
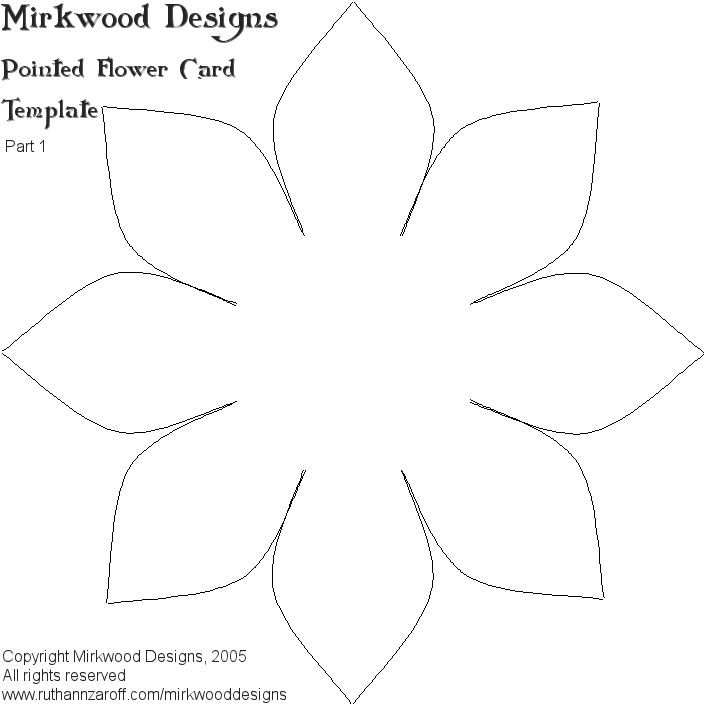
As I waited for my decal to arrive, I began work on the paper flowers. Since I wanted them to be 3-dimensional, I needed to make the flower layered, in a sense. So, I went back to good old google and found a template for a flower. Since I wanted the flowers to be of all different sizes, I printed off the template and then used my printer/copier to copy the template at different sizes, which simply required me to use the zoom feature on my printer/copier. I ended up with 4 different sizes for the bottom layer of the flower (Part 1)

http://www.ruthannzaroff.com/mirkwooddesigns/images/pointedflower1.gif,
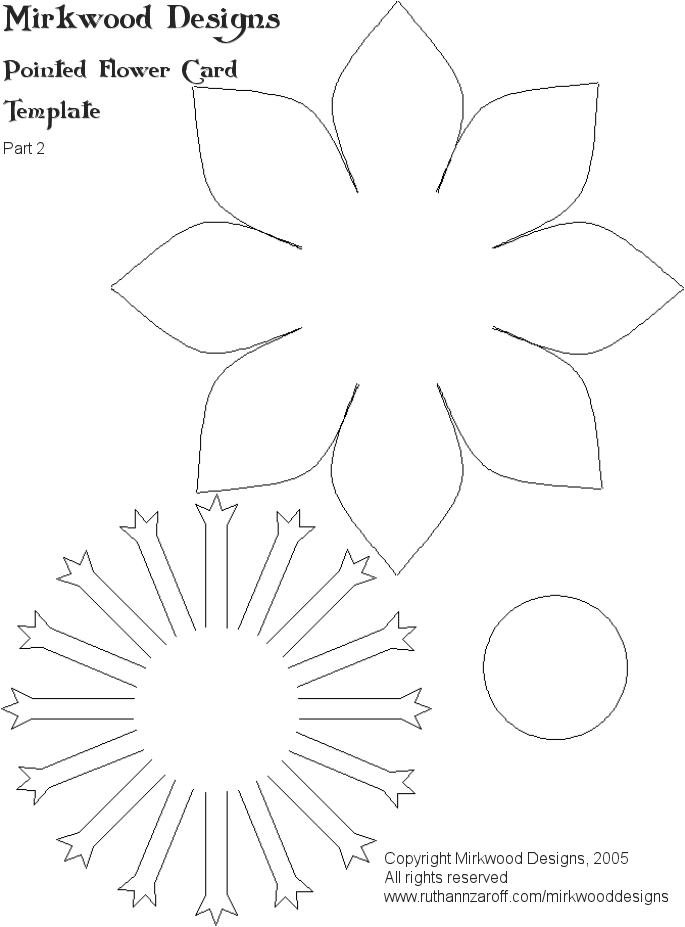
and 4 different sizes for the top layer of the flower (Part 2)

http://www.ruthannzaroff.com/mirkwooddesigns/images/pointedflower2.gif
I didn't use the spiky looking piece as I thought that would be a lot of work. The next step is to make circles for the center of the flower. Again, you need to enlarge or decrease the size of the circle for the 4 different flower sizes. Have I lost you yet?? But, that can all be done using your printer/copier and just making them larger or smaller.
I purchased some pastel card stock paper, which I found in the scrapbooking aisle at Walmart. I bought two different colored pinks and then a light green for the leaves (which I will explain in a bit). Using my templates I cut, BY HAND, several large light pink flowers (Part 1), and then several small darker pink flowers (Part 2). I used the same darker pink paper to cut the center circles for the flowers.
For the leaves I found another template on- line at http://www.ruthannzaroff.com/mirkwooddesigns/images/pointedflower2.gif

Again you will need to make 4 different sizes for the leaves to correspond with the 4 different sized flowers. Use the light green card stock paper to trace and cut the leaves. Again, I cut them BY HAND! You don't need to worry about drawing the lines on the leaves, as it is shown. Once I had all the components cut, I then used Elmer's Glue to glue the smaller flower (Part 2) on top of the larger flower (Part 1). Before I glued them together however, I made sure to cut the individual petals on the flowers a little deeper (cut more toward the center of the flower), as you will need to fold these petals forward later on. Once you have glued the smaller flower to the larger flower, glue the center circle piece in the center of the flower (on top of the smaller flower, Part 2). Allow those to dry. Repeat process for all flowers.
Once they are dried, I then just played with the petals of the top and bottom layer of the flower . I puhsed some petals forward enough so they were standing straight up. I also folded some forward, some back. I used a pencil and rolled some of the tips of the petals back or forward. This helps to give the flowers an individual look, and makes them 3-dimensional. I didn't play too much with the larger flower on the bottom, as you really need them to be mostly flat so they will adhere well to the decal, though you can play with the tips of the petals a bit. With some flowers I did adhere, with glue, two leaves to the flowers. Though, I did keep some leaves unattached as I wanted to place them in random places on my branch decal. All the leaves, I folded lengthwise to again give them dimension.
The branch decal meanwhile arrived in the mail. I actually decided to have the branch be a dark brown rather than the light green shown in the pottery barn kids catalog, as I wanted the branch to pop a bit, especially against my daughter's light pink painted walls. Because the decal was so large and somewhat awkward, my hubby did help me to adhere the decal to the wall. It didn't take us very long. The decals come with instructions as how to adhere them, etc. I then bought some painter's tape, and folded pieces of tape and adhered them to the back of each flower. I stuck the various flowers on the tips of the branches, and whereever else I thought it would look nice. Once I was done this, I took the cut out leaves folded them lengthwise, again to give them dimension, and began sticking the leaves in random places. I made sure that the painter's tape didn't show and that I was sticking it on the decal, not on the wall. Even though Painter's tape is meant to come off the wall without taking the paint off, I thought that it might leave a sticky residue if it remained on the wall for any duration.
The finished product was eye-catching. The best thing is, when my daughter no longer wants flowers on her wall, it is completely removeable, and won't cause any damage to the paint or walls. Here's pics of the finished product

Ignore me and my daughter's reflection in the mirror:-)


Love this too... my extremely talented cousin!
ReplyDeleteNice post, thanks for sharing.
ReplyDelete