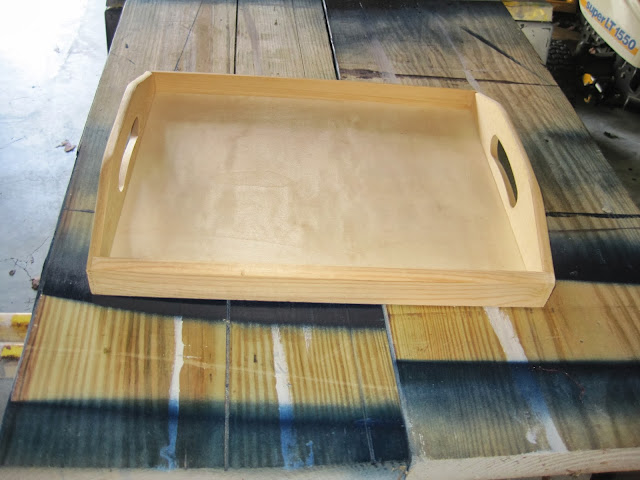
In the midst of all my fall nesting, I did manage to create a couple of inexpensive decorative objects to add to my Master Bedroom and my boys' room.
Sometimes these small little touches can make an otherwise ordinary room, a truly fabulous one. As I've mentioned in prior posts, I've been remodeling my bedroom, and recently started on my boys' bedroom. For my room, I wanted a pop of the same blue that I had used on my Night Stands, Benjamin Moore's Wedgewood Gray, on my dresser! I love the versatility of a serving tray. You can find them almost anywhere. T.J. Maxx always seems to have some really adorable ones. However, because I wanted a certain color, I knew I would need to paint the tray. Well, I happened to stumble across some unfinished, pine trays at A.C. Moore, during one of my last visits. There were various sizes, and styles. They even offered a tray with folding legs! The price for the tray.....$5.99, and with my trusty 40% off coupon, I snagged it for just over $3.00. It's nothing too fancy, but exactly what I was looking for.
It actually was sanded fairly well, so I just took some fine sandpaper and sanded any areas that might have felt rough to the touch. Since the tray had never been stained or painted, I didn't feel the need to use primer. I simply took out the left over Benjamin Moore paint I had from my night stand project and began painting. I used a small angled brush to paint all the corners, and sides, and any other small areas that a roller would not fit. Then I used a small foam roller to apply the paint to all the other flat surfaces. I applied two coats for good coverage, lightly sanding between coats. Here's the finished, painted tray
And here it is on my double dresser in my bedroom.
I haven't quite decided what I should put in the tray. But I just love that little pop of color that is carried throughout my entire bedroom.
But, I didn't stop there...oh no, I mentioned that I added some accents to my boy's bedroom. Well, when I was cleaning and reorganizing my hope chest, I found several old picture frames. I found two identical wooden frames, that were sized for 5x7 photos. Well, no more than a month ago, we had my cousin, who is a very talented photographer, take our family portraits. I love to use photos as art, and when decorating. So, I purchased a 5x7 print of each one of my boys, individually, painted these two wooden frames and placed them in their bedroom.
Here's what the frames looked like before I transformed them
They were actually olive green in color. Well, my sons' room contains a lot of Navy Blue, so I thought I would paint them navy. For this small project, I knew I didn't want to spend for a quart of navy blue paint, so I took one of my son's shirts (which was the exact navy blue I wanted) to Lowes. They scanned the shirt and color matched the paint to the shirt. I actually purchased a sample size of Valspar paint for $4. This is an excellent alternative, if you only need a small amount of paint. It was more than enough paint for these two frames. I simply sanded the frames down to take off the polyurethane, and then began painting. Again, I used a small angled brush to get the paint in all the nooks and crannies, and then went over everything with a small foam roller.
I applied 2-3 coats of paint per frame. Again, I opted not to prime them first, as I was going much darker with the paint color than what was already on there. I'm pretty happy with how they came out and they add, again just a nice pop of color and a really nice decorative touch to their bedroom!
Really quick and easy to do. And, it only cost me $4, plus the cost of the prints!


No comments:
Post a Comment