Pages

Monday, May 11, 2015

Best Product for Washing Windows

Once again, I have been M.I.A.  I do apologize.  I have been actively working on new projects, and finishing up others, but haven't actually sat down to write about any of them, and for that I'm so sorry!  My hubby just finished building a beautiful breakfast nook bench, which I do hope to share with you soon.  He planned, constructed and built the entire thing.  I only painted it, so if there is a tutorial in the future it would have to be shared by him.  But, minimally I can share pictures!

Spring has finally sprung here in the northeast.  Last week was beautiful with sun every day and temps in the 60's-80's.  Every Spring, I feel the nudge to spring clean.  Do not be fooled....I hate spring cleaning, however, it truly is needed, at least in my home.  We are locked up tight all winter long, so dust settles and accumulates everywhere.  One of the tasks I literally despise more than anything is washing windows.  I kid you not!  I used to wash my windows every fall and spring, but now I'm down to once a year.  I have 22 glass doors and windows in my house to wash.  I find the job so tedious and let's be honest when you are done the windows don't even look all that clean, or at least mine don't.  They tend to look streaky.  Well, I happened to be reading another blog, and learned about the e-cloth.  A link was provided to amazon where I quickly began reading all the reviews.  The product received 5 out of 5 stars and had been reviewed by 377 customers.  I put a lot of stake, perhaps too much, in customer reviews.  But, for the lost cost of $13.00, I figured what did I have to lose.  I ordered two window washing cleaning packs for $26.  Here's the description provided by Amazon:

  • Provides lint-free, streak-free, sparkling clean glass using just water not potentially harmful chemicals
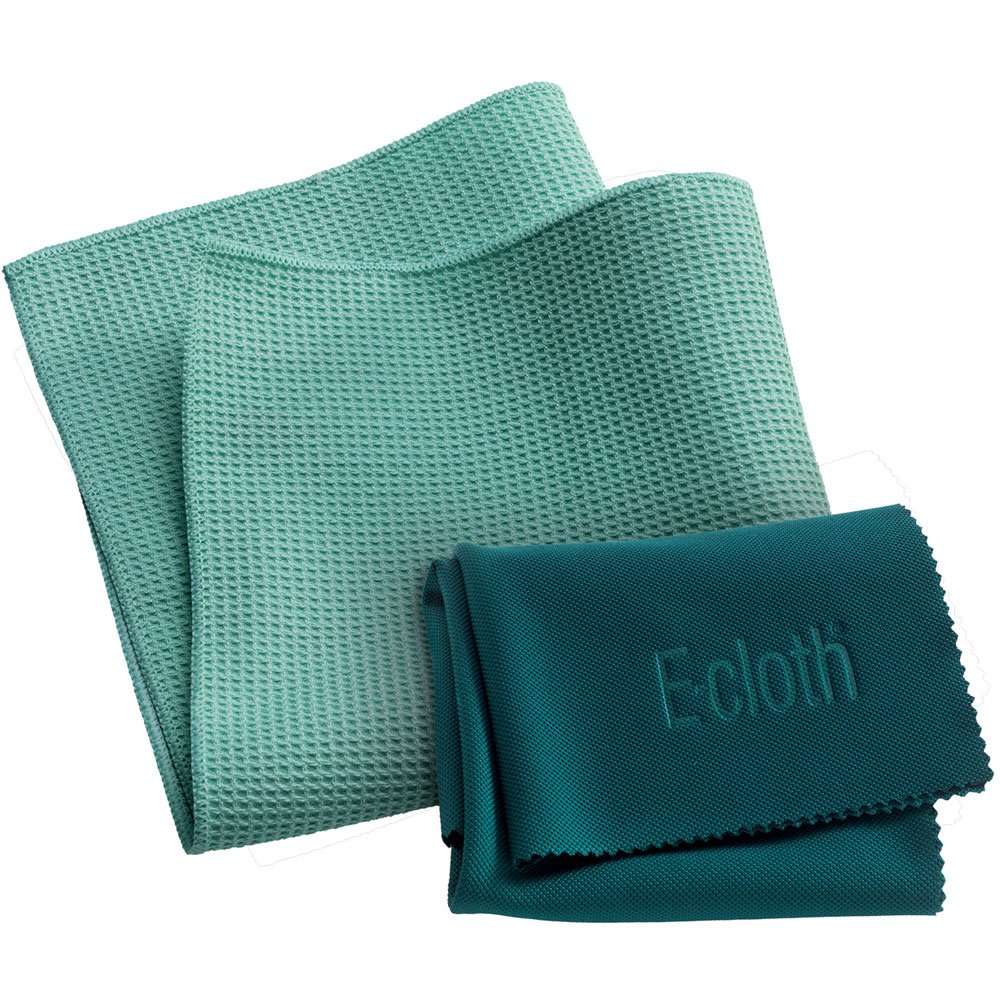
  • Includes one 15.75"x15.75" window cleaning cloth and one 20"x16" glass & polishing cloth
  • Fiber construction penetrates and removes dirt, grease, oil, grime and bacteria with just water
  • Guaranteed for 300 machine washings

When the window kits arrived I immediately had to try them out.  I went to one of the dirtiest windows that had sunlight streaming in.  I realize when you wash windows the "normal" way you aren't supposed to do so in direct sunlight, but I wanted to give the e-cloth a true test.  I took the cleaning cloth and ran it under warm water and wrung it out.  I then washed the window with it, and then took the polishing cloth and dried the window.  OH MY WORD!!!!!  I couldn't believe the results.  The window was spotless.  There were no streaks, and the window was clear of smudges and fingerprints.  It took no time at all to wash the entire window inside and out.  And one of the best features of the cloths....you can wash them in the washing machine and reuse!!!

I have shared this hidden little treasure with all of my Mom friends.  So, I want to introduce it to all of you:  E-Cloth Window Cleaning Pack.  I have washed nearly all my windows, glass doors, and mirrors.  With this amazing product I honestly don't mind washing windows anymore.  It is so fast and easy, and most importantly EFFECTIVE!  But, don't take my word for it, try one.  This is not a paid endorsement, these are my personal opinions, and experience using the E-Cloth.  The only draw back to the product is if you wash several windows at one time, the polishing cloth does get rather damp.  If it becomes too damp it's not as effective.  That is the reason I bought two kits.  But aside from that, I'm sold on this product!

Friday, November 7, 2014

Monogram Wall Decor

Hi there!  I hope you are all enjoying your Fall.  It's starting to get much chillier here in New England, and we actually had our first snowfall this past weekend.  Thankfully we only got 3 inches or so, but it just felt too early for snow.  My youngest exclaimed with pure excitement as he watched the snow flakes fall from the sky, "Can we make Christmas cookies, Mom?"  And with that folks, we had barely got past Halloween, skipped right over Thanksgiving and moved right onto Christmas!  Though, I suppose that's no different than what all the retailers are doing!

Well, my momentum has slowed with projects around my house.  I am still working on the finishing touches for my daughter's room.  I only started this project back in March!?  I always struggle with knowing what to put on the walls.  I want the wall decor to be timeless, yet appropriate for my 8-year-old.  Whimsical yet sophisticated....is that possible?  Anyhow, I love to decorate with framed photos, so centered above her bed is a beautiful black and white framed photo of her.  We had our family portraits taken this fall, so I let my daughter pick out her favorite picture of herself, and we blew it up to a 12x18 size.  I bought a 22 x 28 inch white frame at A.C. Moore for $20.  Since the size it not a standard size, I had to purchase a mat on-line from Frame Destination.  Their prices and shipping rates were unbeatable.  The quality was wonderful, and I received the mat in less than a week.  I was super impressed with how carefully the mat was packaged.  There was so much bubble wrap, my kiddos and I actually took the bubble wrap outside and laid in on our driveway and jumped all over it, screaming and laughing the whole time.

Here's how it looks centered above her bed.


I know you're wondering where does the monogram wall art come into play, right?  Well, before we began this room redo, my daughter had a letter "E" wall decal on one of her walls.  She loved that decal, and was bummed that we had to take it down, in order to paint her room.  Note, decals once you take them off, are VERY difficult if not near impossible to reapply.  That being said, I thought it would be fun to have her initials monogrammed, and when I shared the idea with her, she was elated.  I stumbled upon this blog post one day several weeks prior by Dixie Delights.  She made a monogrammed canvas, and it turned out so beautifully, that I decided to give it a try.  It was super easy.  I simply bought the size canvas that I wanted for the space I intended to use it in.  I actually ended up with the 22 x 28 inch size, which is rather ironic as this is the same size of the framed photo above.  I searched etsy and ebay and stumbled upon a vendor who made an 18" Wooden Vine Monogram  for $11.50 with only $3.50 in shipping.  This price was unbeatable, and trust me when I say I scoured the internet to find the best price.  The monogram came unfinished, in birch wood. The best part for me was it is made right here in the USA!  The length measured 18" long and the middle initial was 12" high, with the others letters with a height of 9".  I would have liked for the letters to have been taller, but for the price I was willing to compromise.  

When I received the monogram I lightly sanded it, and then applied the paint of my choice.  I opted to have Home Depot Color Match the paint to my daughter's coral/peach quilt.  I bought a sample of Behr paint for $3, which was more than enough paint.  I opted for a flat finish as I knew I would be painting the canvas with Benjamin Moore's Simply White, Semi-Gloss finish, as this was the paint that I had on hand and used to paint all the trim in my daughter's room.  It did take a bit of time to paint the monogram.  I applied two coats to fully cover.  Make sure you have a paper bag or piece of cardboard under the monogram as you paint it.  It can make a bit of a mess as you aren't just painting the top, but rather curvy sides.  The best advice I can give you is to take your time and go slowly.  It is super easy to get drips and runs, so paint slowly and with little paint on your brush, and watch closely for runs.  

Here's how the monogram looked upon arrival


As you paint, it's helpful to hold the monogram in one hand and paint with the other hand.  Make sure you get paint into all the crevices.  


And, here's what it looked like after the second coat of paint.  


As I mentioned earlier I bought a blank canvas sized 22 x 28 at A.C. Moore for $10.  All canvases were 50%.  Lucky me!!!  


  I then gave the canvas two coats of Ben Moore's Simply White.  Once it was dry, I took my decal and centered in on each side and then from top and bottom.  I took a pencil and outlined some of the monogram on the canvas so I would be able to line the monogram back up where it should be once I applied the glue.  I then turned the monogram over and applied super glue to the entire monogram.  Here's where it got a little tricky......when I placed the monogram on the canvas, I tried to only place one side on first to make sure that lined up first, but it didn't happen that way.  It ended up sticking to the canvas in all the wrong places, and wasn't lined up correctly.  I quickly lifted it off and tried again.  I was able to get it lined up pretty well, but then I had glue residue on the canvas.  So, I got the simply white paint out again and touched up those spots where the glue showed.  It did cover the glue spots and ended up looking just fine, but if I were to do it again, I would have waited until I had another person to hold the other side of the monogram and place it down on the canvas in a more controlled manner.  Regardless, it looks beautiful and my daughter thinks it is so special!


Sorry the photos aren't the best.  The lighting was poor that day and the light from the window caused a glare of sorts on the canvas, but you get the idea!  

Tuesday, October 21, 2014

MORE CRAFTSMAN MOULDING

Hello there!  I am gearing up for 4 consecutive days of RAIN and WIND here in New England, or perhaps I shouldn't say gearing up!  So, I thought it would be a good time to sit down and write about the latest project I completed.

As some of you may recall, this past Spring hubby and I replaced all the builder-grade trim and mouldings in our daughter's room with white craftsman moulding.  I had mentioned that my hope is to replace all the cherry-stained pine trim and mouldings in my house with white craftsman moulding.  So, we tackled our sons' room next.  Here's what it looked like before we began the change-over


And, here's what it looks like now


I can't believe the difference it makes.  The room appears so much brighter and cleaner.  The baseboard is much wider than what we had before, and I love that!

This time around, to save time, we purchased all pre-primed materials.  With the exception of the lattice that we used on the headers, everything was primed.  It does cost more, but it is SOOOOOOOO worth it.  I painted two coats of Sherwin Williams ProClassic Semi-Gloss in the color white (right off the shelf).  This is an interior Acrylic Latex specifically for trim and doors.  In my daughter's room we used Benjamin Moore's Advance Paint.  They are both comparable in quality and finish.  Once my hubby got all the trim up and in place, I filled the nail holes with Red Devil ONETIME lightweight spackling.  I simply filled the holes with a small amount of spackling on my finger, pushed it in the hole and wiped off any access.  I allowed it to dry for 2-4 hours, and then lightly sanded those spots.  I then applied two coats of primer over the filled holes, and some paint over the areas that had been primed.  The reason I primed over the filled nail holes, is painting over them alone will not conceal the holes.  If you just paint over the filled holes, there's a flashing affect, and the nail hole remains visible.  By applying primer over the filled holes, it alleviates that issue.

We are so happy with the outcome, and after a small break, we will tackle another room!  It's so fun to see the transformation happening right before your eyes!

Here it is again.

BEFORE
AFTER


Monday, September 29, 2014

Patio Door - COMPLETED

Happy Fall everyone!  This is truly a very beautiful time of year here in New England.  The leaves are starting to change colors, the mornings are cool and crisp, and I always seem to have this extreme desire to bake anything with apples and pumpkin!

I realize it's been awhile since I last posted anything.  I have a confession....I always seem to think no one wants to see the progress being made until the project is complete...so time goes by as I'm working on various projects, and subsequently I'm not blogging during that time period.  I'll try to be better about that, because honestly the process is as important, if not even more so than the finished product.  Though, I must admit I'm a sucker for seeing the before and afters, so I'll try find a middle ground!

This past July we removed our patio sliding glass door, and replaced it with a single panel glass patio door.  You can read about that process here.  Now that the kids are all back to school, I had a chance to finally paint the door, which I decided to paint BLACK!  I then painted the jam, and trim white. My hubby made the same craftsman moulding that we did in our daughter's room, for the patio door.
I think it looks absolutely stunning.  I love the sharp contrast of the black door against the white trim work.  What do you all think?


Let me remind of what it looked like before it was painted and trimmed out.


Quite a difference!

Obviously, the remainder of the downstairs of our home has the classic, builder-grade, cherry-stained window and door trim, but with time we intend to convert all mouldings in the house to this white craftsman-style moulding.  What do you all think....do you like the black door against the white trim?


Tuesday, July 29, 2014

Sliding Patio Door - NO MORE!

Summer time, summer time, sum, sum, summer time!  Oh how I love summer time!  I love having my kiddos home, the leisureliness, the lack of a strict routine, spontaneous outings/adventures, trips to the beach, swimming in the pool, the warmth of the hot sun, shorts and flip flops, ice cream, barbeque's, and the list goes on and on.  Yes, folks this is definitely my favorite time of year.  We have been having such a wonderful summer!

My hubby and I have been rather productive around the house with getting to some of the projects we have put off, or secretly hoped they will take care of themselves :)  My hubby has been far more productive then I, if I must be honest.  Our home was built nearly 13 years ago this September, so with age comes repairs.  For the past two years, our sliding patio door has not functioned properly.  The door became impossible to slide open.  Well, it didn't take long to realize that moisture had gotten behind the fascia board just below the door.  When rain fell from the roof, it landed on our deck and splattered back on the fascia board.  Over time, the wood began to rot, and oh boy did it rot!  When moisture gets trapped, it continues to decay the wood, and it causes the wood to swell, thus the reason why we couldn't open the patio door well.  Our quick fix was to take a Skil Saw and cut the top portion of the door off, just an inch or so, so it would slide on the track better.  This did the trick, but we knew we would need to minimally replace the fascia board and gut out any rot.  The sliding door really needed to be replaced as we could no longer raise or lower the door on the track, as we striped it the multiple times we "tried" to fix the issue with it not sliding well.  We have also been considering updating our kitchen in the near future, and of course I really want more storage space.  So with that, we decided we would replace our sliding patio door, which was 6 feet wide, with a single-hinged full glass patio door (36" wide).  We felt like this would meet both needs, as we needed a new door, and by downsizing to a single-hinged door, I would gain 3-4 feet of wall space for a pantry cabinet.  Here's a picture of our sliding door.  We planned to put the single-hinged patio door on the right-hand side of the patio door, with the hinges against the far right-hand side and the door handle on the left-hand side of the door.


We have learned from experience, it's best to hire the professionals to replace doors and windows.  So, we called up our favorite contractor, and asked him to do the job.  We spent a great deal of time looking at doors, and trying to determine what we really wanted.  We ended up going with the Andersen A-Series Hinged Patio Door.

Hinged Patio Door

A-SERIES

HINGED PATIO DOOR

  • Traditional French door styling
  • Energy efficient
  • Solid wood door
  • Quality construction with mortise-and-tenon dowel joints
  • Multipoint locking system that seals the doors tight at the top, center and bottom

The interior part of the door is wood, and the exterior is vinyl.  Though there's ample choices within that.  We ended up ordering the door with a wood interior and white vinyl exterior.  The hardware we chose was Satin Nickel.  It was a special order door, and took about 3-4 weeks to arrive at our local Lumber Company.  

Our contractor arrived on a hot, July morning, and began by taking the old slider out, and then framed up the 3-foot section of the opening that was now going to be a wall.  As he went to put the new door in, he noticed there was some damage to the vinyl on the exterior of the door.  Panic set in of course, since I now have a hole in my house and no new door to put in.   Our lumber company was great and dealt with the issue promptly, but the best they could do was get us a new door in 3 days.  So, our contractor hung the door that was damaged, and then when the new door arrived, he came back to install that door.  It looks beautiful.  It has taken me a bit to get accustomed to not having a slider, for the simple reason that our view from inside the house of our patio and backyard is much smaller.  However, I am thoroughly loving the fact that I now have more wall space and anticipate the day when we can add a pantry cabinet!  Oh, and for those who may be wondering if my kitchen is darker without that additional door panel, it really isn't.  But, here's the reason....our patio is screened in with a roof and all.  Since we added that on almost 2 years ago, we had a lot less light coming through the sliding patio door.  With half that door now walled up, I really haven't noticed any decrease in the amount of light that naturally comes through the door!  Here's a look at it now, though we haven't gotten around to putting up the mouldings yet, and still need to do another coat of paint.  


Look at all the wall space!  I'm really excited about it!  Oh, and as you can see I haven't taken the protective plastic off the interior of the door, but we are waiting to paint/stain the door before we take it off.  Now, to decide whether we should paint or stain it?  Any thoughts.  I was thinking I would initially stain it a dark cherry to go with our table, but then I was thinking a black or dark gray might look nice too.  HMMMM?
 

Tuesday, June 10, 2014

Craftsman Molding for our not-so-little girl

Hello there!  Once again, it has been awhile since I last posted.  Trust me when I say, it's not for lack of projects!  For about four weeks back in April/May my hubby and I took on the job of repainting our daughter's room. At first, we thought we would just paint the walls, as our almost 8 year-old didn't like her two-toned pink anymore.

  She wanted something a bit more mature and indicated that she wanted her room to be turquoise.  Well, since we had only painted her walls pink 3-4 years prior, I thought it would be best to pick a neutral paint color for the walls, and add the turquoise color, either by way of her bedding or accessories.  My daughter was fine with that idea, and I felt good about the fact that I wouldn't need to repaint her walls in a couple years time.  We decided upon a very light shade of gray.  In fact, the color is Benjamin Moore's Marilyn's Dress, with more black added in to darker the gray a tad.  I didn't want a gray with any undertones, so the make-up of Marilyn's Dress is literally white with some black added to it.  This subtle shade of gray would compliment just about any accent color, especially turquoise.

Our daughter's room had a chair rail (in the photo above you can see where the chair rail was located), and I decided that I didn't want that up anymore, so my hubby tore it off the wall, and once that was down, I thought, "What better time then now, to update/change all the trim in the room."   You see, all the woodwork in our home is stained a bright cherry color.  Though, I still LOVE that cherry stain, I was ready for something different....something brighter.  So, I convinced.. yes, convinced my husband that it was a good idea to replace all the moldings in my daughter's room to a white trim, baseboards included.   It was also a great excuse to make "craftsman molding", which I have been drooling over ever since I read the post over at Thrifty Decor Chick, on how to make your own Craftsman molding.  Here's what I'm talking about

replacing skinny door trim

My hubby bought all kinds of pine boards (1x4's), along with other lumber per the instructions provided at Thrifty Decor Chick for the door and closet, and then followed the DIY tutorial at Thrifty Decor Chick for the window.  Tearing off all the trim around the window, door and closet, saved me a lot of time priming and painting over our existing trim.  However, the interior of all the windows in our home are wooden, so I had sand, prime and paint over all the cherry stain, and lather, rinse and repeat for the door and closet door.  Believe it or not, I applied two coats of stain-blocking primer, and then painted nearly 5-6 coats of paint just to cover the cherry stain.  I used Benjamin Moore Advance in Semi-Gloss.  It's an Alkyd-based paint, and is ideal for wood trim.  It's super easy to work with and apply, but after this experience perhaps the coverage isn't that great.  The color is Simply White.  Though, I did have the folks at Aubuchon Hardware, add a bit more white to the Simply White formula, as it wasn't as bright as I had envisioned.  I am so visual, it's not funny!  Now I realize that I personally love the stark contrast of bright white against nearly anything, so WHEN I get brave enough to redo the trim work in my boys' room, I will get a stark white, probably right off the shelf.  

My hubby filled all the holes left after tearing the chair rail off, and sanded the area once it had dried.  He then primed all the walls, and painted them. While he did that, I painted all the trim boards and molding (craftsman and baseboard).  We then adhered the trim to the wall with hubby's nail gun, which worked like a gem!

 Of course, I now want to do this in every room of our house, but it truly is a very time consuming project.  It's also a hard one to justify when all the trim in our home is in near perfect condition.  But, what a huge difference it has made in our daughter's room.


Remember the before  

And the after   

I love the subtle, cool gray walls against the soft white trim.  Now, I must get busy with "decorating" the room.  My daughter has picked out a lovely, contemporary aqua and white comforter set, so we will build on this and will keep you all posted!

Tuesday, April 29, 2014

Turning a Guitar Into Wall Art

Hello there!  It's a damp, cloundy day here in New England...perfect day to sit down and blog about one of my latest projects!  I've been working on the finishing touches of my boys' bedroom, and really wanted to incorporate my oldest son's very first youth-sized electric guitar into the room.  Since my son recently purchased a full-sized guitar, of which is sitting in his guitar stand on the floor, I thought it would be a neat idea to turn his old guitar into wall art.

I happened to stumble upon the perfect solution over at Amy's Casablanca.  It was exactly what I was envisioning


Courtesy of Amy's Casablanca

So, I hopped into my car and headed to Home Depot to buy several fence pickets.  Now, I learned the hard way, fence pickets are a "seasonal item", so they didn't become available at my local Home Depot until the first of April.  The pickets were only 3" wide, but they were 6 feet long.  It's helpful to know the dimensions of your guitar, which I did (I'm surprised I remembered to do this step, actually) before you go to purchase your pickets.  I knew the length would be more than adequate, but where the pickets were so narrow, I knew I would need several, so I  bought six of them, to ensure enough width for the guitar and then a little extra on each side of the guitar. One picket was for the back...to hold all the pickets together (more on that later).  The pickets were not in great shape. We had to look each picket over really well, as many of them have a lot of imperfections.  The pickets cost all of $1.68/a piece.  While at Home Depot, I also purchased a small sample size of Glidden paint, to paint the pickets. The test size is perfect for small little projects like this.  It cost all of $5.   I opted to get a gray color called Dolphin.

Since I'm not comfortable using my husband's saw, I asked him to take over and cut the pickets down to size.  He began by lining them all up and cutting off an inch or so on the bottoms, just to give them a straight, perfect edge.  He then cut off the tops.


The dimensions we ended up with were 17 inches wide by 42 inches long.  As you can see from the above photo, we used five pickets across,  We took the sixth picket, cut the top of the picket off, and then cut that piece into three smaller pieces.  The length of each piece was just shy of the total width of the five picket, roughly 15 inches long.  To get the pickets to adhere, my hubby placed the three pieces horizontally across the back:  one near the top, middle and bottom, as such:
and then used screws to screw the horizontal pieces to the vertical fence pickets.  Make sure not to use screws that are too long as they will poke through to the front side.

Our horizontal planks weren't aligned perfectly, but that was my fault, as I thought my hubby had initially made the planks too long in proportion to the guitar so he just cut off one end to give me the desired length I wanted.  Otherwise, they would have been perfectly aligned...OOPS!  Thankfully, you can't see this!

Hubby then used his key-hole router bit, and routed an area on the top horizontal piece to allow for us to hang it on the wall.  Two nail heads fit perfectly in the key-hole opening!

The next step was to paint it.  I wanted a rustic look and feel, so I didn't sand the planks much.  And, when I painted, I only put on one coat, as I didn't want full coverage.


The next step was to adhere the guitar hanger.  This little hanger was very inexpensive.  I think I paid $4-5 on Amazon.

It came with screws, so we laid the guitar on the planks and positioned the hanger where we thought we wanted it to be placed.  My hubby then screwed the hanger to the fence pickets, and we placed it on the wall with two nails, which again fit right into the key-holes hubby had routered.  Here's the end result!


And another shot  

Here's a side view  

A really simple project, all for less than $22!  I couldn't be more pleased with how it turned out and my son loves it.  What more could I ask for!